Monday, March 29, 2010

LAXATIVES, PROJECTS, AND SUN


To start off, we had a mini step today with potty training for Madysen.
She asked to go #2 on the potty. I was elated that she wanted to try, so of course I helped her try, and try, and try, and try, and try....for pretty much most of the last 4 hours!! But, I figured if she showed the interest, I better support it. We have been using laxatives for almost 2 months now per our pediatrician to help her overcome her fear of a bowel movement. At first, I thought this "treatment" was absurd, but after doing some further research, I see that is much more common that I expected. Needless to say, there was no BM on the toilet, but I was proud of her for her interest. Hey, she might be 10 and still need a diaper to #2..ya never know!!

Does anyone else have this issue with their toddler?? Please, any tips or suggestions are welcome!!

Okay on to something more exciting than poo in the toilet. Ha!
I made this frame a few months ago after seeing something similar at a craft show.
I thought the saying was so precious.


I bought an unfinished frame at Michaels for $4.99.
I taped the lines using painter's tape and wrote the saying with a black sharpie.
Hope you enjoy!

Looking forward to a week of beautiful weather here! I apologize ahead of time for lack of projects; I'll be spending as much time as possible outside!!
Have a blessed Easter week!!


Sumo Sweet Stuff

Wednesday, March 24, 2010

THIS is the final rose...

Let me first start off by confessing that yes, I did have a neon beer sign hanging in the living room for the last 3 years. My husband was desperately trying to hold on to that itsy bitsy part of his "bachelor" days and with two small children, I didn't have the energy to fight it. Plus, I knew I had to have that "perfect" replacement before even trying to remove the darn thing. You see, my husband thinks that everything must be securely mounted with heavy-duty screws (like we get crazy earthquakes in IL), so I knew that I'd have huge holes in the wall.

I eagerly awaited the day when the neon glare would be no more. I often joked that when he turned it on, the kids and I would suffer from migraines.

Then finally, one day last summer we went to our friend's new house, and I saw these gorgeous, unique shelves our friend had built. His shelves were amazing, and I knew that Jeff could make something similar, but smaller to replace the beer sign.

I don't think we even made it home before I was nagging him to build it.

So here's the awful before (I'm so embarrassed to show this...)


Now that's one beautiful bar sign! *gagging...gagging***

And here is our version of our friend's shelves:


I really love it for our space.
I love the small lights he mounted underneath.
I love that now I have a space to proudly display our family pictures.
I do not love that the cord shows...but hey, it's better than a neon glow!!!

Sunday, March 21, 2010

Out with the red...in with the green


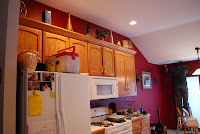
So, the kitchen project is pretty much complete (minus a few details like persuading the husband to get new countertops..oh yeah and the curtains). As with most projects, this has provoked a whole revolution of change. Of course it couldn't just be concentrated to the kitchen because our house is an open-concept. Now I must change the decor in my living room, computer room to match...and the snowball continues. (my husband just loves this part...NOT)

But, I understand that my burgundy sheers in the living room might just have to wait considering we are on a single income and the economy just sucks right now. So, if you come to visit, deal with the obnoxious clashing going on right now until I can score a deal on new curtains. I wish that I could sew because curtains are EXPENSIVE. Call me cheap, but I refuse to pay a lot for some fabric that hangs on my window who's only purpose is decoration!! :)

Anyway enough with my rant on curtains. Now to the kitchen. Here's a before in case you forgot...


To the exciting part:


Yay for mirrors from Ikea $2.99
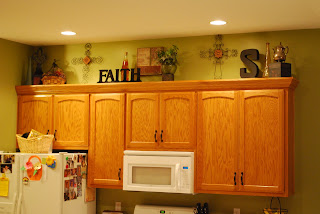
My favorite part is above the cabinets!!


(the painting here looks like it's hung too high, but I took this picture standing on a ladder...when you are at a normal level, it's perfect.)


Friday, March 19, 2010

It's the small things that matter

This week I have been showing you some projects I completed for my "mini" kitchen makeover. I tried my hardest to give the kitchen an updated look, but on a very minimal budget.

Some of my existing accessories didn't match the new look. What is a girl to do??
HELLLLLLLOOOO... enter can of Oil Rubbed Bronze Spray paint.
Even though I have already showed you my "new" hardware for the cabinets,
I think you need a good close up of the before to get the true impact!


See how much better the new ORB handles are??
(The lighting was totally different in the two pictures...I didn't change anything with the color of the cabinets.)


The next little thing I changed was my paper towel holder. It used to be chrome.
Now, I always thought chrome was my favorite until I came across ORB.
So, the paper towel holder had to be changed.
(Sorry no before pic).


I showed you here how I updated our kitchen stools to fit the new look.

Target must have known that I painted my kitchen and would
be in need of new placemats because these were $.74 each!!!!


I also changed out my crusty, nasty, white garbage for a new
"step" black garbage. (11.97 at Walmart.)

Add a coordinating rug from HomeGoods (7.98)


Even though these changes were somewhat minor, they made a huge impact on final outcome.
At times they were a bit time consuming (stools), but it saved us a lot of money and it looks great!

Sunday I will post the pictures of the entire kitchen so you can see it all put together!

Thursday, March 18, 2010

Twine is the new black


Everyone has at least three zillion of those plain glass vases, right??

(uhem..I only 2! My husband obviously doesn't send me flowers very often!)

Anyway...back to the project! Sarah at Thrifty Decor Chick had a brilliant idea to take these vases and cover them with twine. ( She might have used jute, but same idea!)


What a perfect idea!!! I LOVE her!!

Just spray the glass vase with spray adhesive.
Then start wrapping with twine!

Hint: If any of the adhesive shows on the glass after you are finished wrapping, just use a little rubbing alcohol to take it off!

So, Hobby Lobby had all floral stems 1/2 off.
Here's what I started with:

I had to cut the styrofoam to fit in the vase.
After playing around a bit with the arrangement, I finally got it just right.


I'm not sure the right spot yet for it- maybe a centerpiece for the table??
But for now, it's on the counter.


Tuesday, March 16, 2010

Bleach T-Shirts

Can I start off by saying how much I LOVE LOVE LOVE this project? It is super cute, super easy, and best of all-- super CHEAP. My inspiration for this project came from Jamee over at Homemaker.
(Visit her blog, and I'm sure you'll be hooked like me!)

First, you take a plain T-shirt. I got mine from the Dollar Tree!
Exhibit A :
T
hen, using my Cricut, I cut out the letters on cardstock.
I sprayed the back of the letters with some adhesive.
Then placed them on the shirt.
Exhibit B:
(Sorry for the turned picture, I could not get it to turn the right way. I gave up trying!!!)

I put some bleach in a spray bottle and added a little water.
Spray up in the air and let the mist fall down on the shirt.

*** Put something in the shirt to keep it from bleaching the back too!***

Let dry for about 10 minutes and then remove the letters.
I loved them so much I made my Godson one too! Aren't they just adorable???


I made the pink one first and used too much bleach, but I still like the outcome.
This is a cute, inexpensive gift any kid would love!!!

I will be linking this project to this party. Check it out!


Friday Follow

Monday, March 15, 2010

Inspiration Week

I have been working on several little projects to accessorize my kitchen, most of which came from some very talented bloggers. I decided to do an Inspiration Week in which I share with all of you a different project each day. On Friday, I'll reveal my entire new kitchen that I updated on a very strict budget.


To my first project--

I absolutely have a sick obsession with monograms and family names. I know, how many can you possibly put up in your house, right?? I came across this idea on Imperfectly Beautiful and knew I must make one. If you haven't visited her site, check it out! She has amazing ideas!!

My new kitchen has been pretty bare--lack of accessories and lack of money to purchase new ones. So a much needed trip to GoodWill produced a simple, black frame ($.99) for this adorable project.


I dusted off my Cricut and cut the letters using the Alphalicious cartridge and some black vinyl. I added some light blue scrapbook paper for the background.
LOVE LOVE LOVE! Cheap and easy to make!

Here's the new accessory on my counter!

Sunday, March 14, 2010

Photo Blocks

I did this little craft a few weeks ago and am so excited to find a place for it in our house.


I came across this idea on a blog one night, but can not find it again. So, whoever featured this on their blog, I apologize for not acknowledging you. If you message me, I will post the link to your blog as my inspiration.

First, I cut some wooden blocks using my husband's compound miter saw. (Yes, I made all the cuts myself, with his supervision!!) I started with a 4X4 and cut 3 blocks of different sizes: 3 1/2 x 3 1/2, 3X3, and finally a 2 1/2 X 2 1/2.

Next, I painted the edges black. I printed my favorite photos on regular paper (better to modge podge with. I applied a thin coat of the mod podge to the blocks and applied the pictures. After I let it dry for 20 mins, I put another thin coat over the entire picture and block, giving it a nice sealed finish. I sanded the edges down to give it the "worn" look and here you have it.


This project will be on this link party:


Sumo Sweet Stuff

Saturday, March 13, 2010

Goodwill Weekend!!

So, I went into Goodwill this weekend looking for some chunky, wood candlesticks for an upcoming project. Instead, I came out with a cart full of fun stuff and no candlesticks. Check out my treasures from this week:

This cute little white bowl only $.99!!!


Another adorable bowl $2.99

My favorite treasure was this coffee table for $24. Not only is it solid wood, but it is in great shape and super huge!!! I LOVE it! Now I just need to sand it and slap some paint on it. After pictures hopefully to follow soon.

Here is what I did with the first small white bowl. Add some moss with a few eggs and you have a cute Spring decoration!!


Wednesday, March 10, 2010

Kitchen Stools

Sorry for the lack of posts this past week. I have not forgotten all of you, just been really busy. My 3 year old has started a few classes this past week, so I have officially become a "soccer mom". I never knew how much I would LOVE it! She started tumbling on Tuesdays, which is so fun to watch. The teacher has asked that the parents do not stay in the gym, but watch from the windows. This is a very big step for Miss Maddy because she has never participated in an "independent" class. Surprisingly, she didn't even notice I wasn't there. I instead took the 45 minutes to walk the track with my husband, killing two birds with one stone. We were able to have a little time to ourselves as well as fit in some much needed cardio!

We would peek down at the little tumblers, and even though the teacher had to keep reminding Madysen to stay in line, I was beaming with pride. One of the minor disadvantages of staying at home is that my girls have become pretty shy when it comes to social settings. I have tried really hard to keep Maddy involved in different programs around our area, but she never really engages in the activities, just stays glued to my leg. Finally, tumbling has broke her out of her shell (maybe even a little too much!!) Needless to say, we had a blast watching our little Princess have so much fun with all the other girls.

Now on to some projects...

Time to show you what I have been working on. We used to have these stools in our kitchen.


I do believe these stools came from someone's trash that my sister-in-law spotted as a treasure. The stools were just "okay", but when I painted the kitchen, I knew they needed a facelift. To update them, I just painted the legs black.


A cheap, easy way to update something I already had and make it work with my new space! Hope you enjoy!

Tuesday, March 2, 2010

Amazingly delicious

For dinner the other night, I made this.


I realize the picture does not capture the true deliciousness of this 1/2 Organic Mexican pizza, however it was fantastic. Here's what you need to make this heavenly pizza:

1- premade crust (Usually come in pkg of 2)
1- 14 oz can Refried beans, divided (I used organic)
1.5 lbs ground beef (try grass-fed beef...it's amazing)
1- Taco Seasoning Packet
2- small Roma Tomatoes (organic)
Shredded Cheddar Cheese (organic)
Lettuce (organic)
Sour Cream
Doritos (not so organic)

Brown the ground beef, drain. Add taco seasoning and water (per pkg).
Meanwhile, brush olive oil over the crusts of the pizza
Spread refried beans evenly over each crust.
Top with seasoned beef and shredded cheese.
Bake 350 for 10-12 minutes
Then add diced tomatoes, lettuce, and crush up dorito's!
Sour cream optional.

This recipe will give you enough to make both pizza crusts. Hope you enjoy it as much as I did.